Firebase是一個集結多個雲端服務的Google產品,裡面有推播、身分驗證、軟體自動化測試等功能。
在這邊我要介紹的是雲端推播的功能 — Cloud Messaging
主要目標是讓我們可以接收到來自伺服器傳送過來的通知訊息,並且顯示在通知欄上。
1.請至Firebase控制台開啟一個專案之後,進到專案總覽畫面新增一個Android應用程式
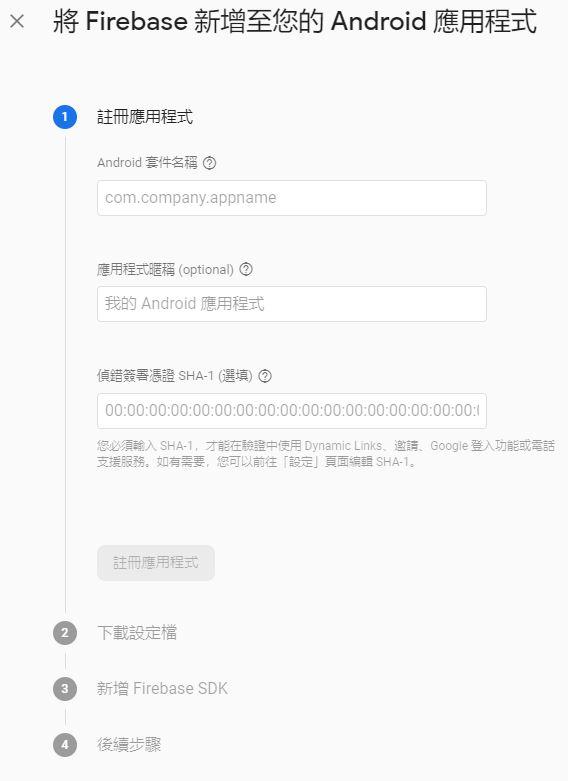
這邊只要輸入專案的套件名稱,其他部分可以選填,然後進入第二步。
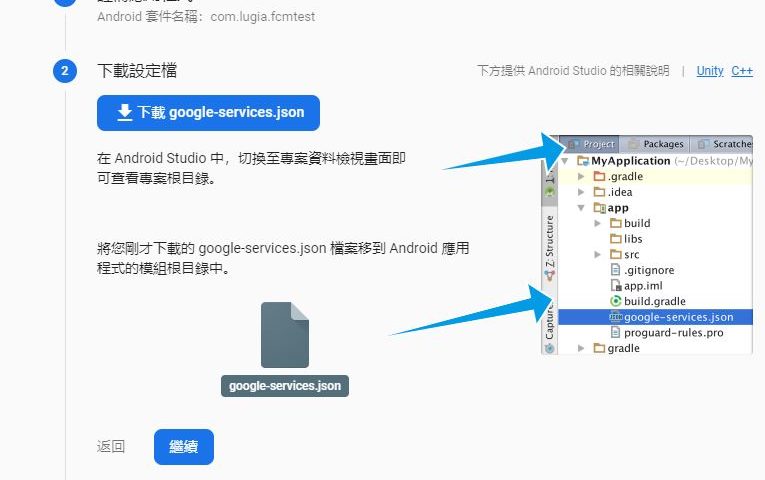
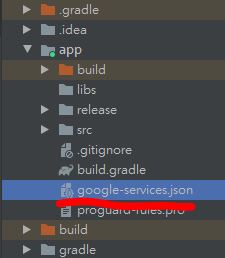
2.下載google-services.json並放到專案中
3.新增SDK套件
在專案層級 build.gradle 加入:
buildscript {
  repositories {
    // Check that you have the following line (if not, add it):
    google()  // Google's Maven repository
  }
  dependencies {
    // Add this line
    classpath 'com.google.gms:google-services:4.3.4'
  }
}

allprojects {
  repositories {
    // Check that you have the following line (if not, add it):
    google()  // Google's Maven repository
  }
}
在APP層級 build.gradle 加入:
apply plugin: 'com.android.application'
// Add this line
apply plugin: 'com.google.gms.google-services'

dependencies {
  // Import the Firebase BoM
  implementation platform('com.google.firebase:firebase-bom:26.1.0')

  //Cloud Messaging
  implementation 'com.google.firebase:firebase-messaging'
}
之後進行同步。
4.增加接收推播用的Class:
這邊取名以 FirebaseMessageService 為例
//管理推播通知
public class FirebaseMessageService extends FirebaseMessagingService {

    @Override
    public void onMessageReceived(RemoteMessage remoteMessage) {
        super.onMessageReceived(remoteMessage);

    //資料形式為推播(從Firebase控制台做測試推播時的格式)
        if (remoteMessage.getNotification() != null) {
            LogUtil.d("FirebaseMessageService","Title = " + remoteMessage.getNotification().getTitle());
            LogUtil.d("FirebaseMessageService","Body = " + remoteMessage.getNotification().getBody());
        }

    //資料形式為DATA
        if (remoteMessage.getData().size() > 0) {//只有這種形式才能用自訂的通知顯示
            LogUtil.d("FirebaseMessageService", "收到DATA訊息: " + remoteMessage.getData());
    }
  }

    @Override//取得了新Token
    public void onNewToken(String s) {
        super.onNewToken(s);
        LogUtil.d("FirebaseMessageService","HaveNewToken = " + s);
    }

}
5.在AndroidManifest.xml中新增FirebaseMessageService:
<service android:name=".Services.FirebaseMessageService">
  <intent-filter>
    <action android:name="com.google.firebase.MESSAGING_EVENT" />
  </intent-filter>
</service>
6.初始化推播並取得Device Token:
通常在MainActivity中初始化
//FCM推播初始化
if (Build.VERSION.SDK_INT >= Build.VERSION_CODES.O) {
  // Create channel to show notifications. 綁定8.0以上推播通道
  String channelId  = "default_notification_channel_id";//default_notification_channel_id
  String channelName = "推播服務";
  NotificationManager notificationManager = getSystemService(NotificationManager.class);
  notificationManager.createNotificationChannel(new NotificationChannel(channelId, channelName, NotificationManager.IMPORTANCE_HIGH));
}
//取得並存至全域變數FCM Token
FirebaseInstanceId.getInstance().getInstanceId().addOnCompleteListener(task -> {
  if (!task.isSuccessful()) {//要顯示不支援此裝置,直接擋掉APP
    LogUtil.e("Firebase","取得DeviceToken失敗" + task.getException());
    //showNotSupportDialog("錯誤","不支援此裝置","關閉程式");
    return;
  }
  // Get new Instance ID token
  //取得Token
  LogUtil.d("Firebase","DeviceToken = " + task.getResult().getToken());
});
7.到目前為止,將app執行後就能開始接收推播:
app 中取得的 Token
D/11:33:16.572/Firebase: DeviceToken = caqA_aIgQMqJtizrva63BD:APA91bHHtGf4hlpxxxxxxxxxuljXYlv1bQNmAKqFN-HK9fb7ll1y7Q3GYlkOGKIfSvhCrbVGSq-uEAKlB61yqTStHvIPxxxxxxx0oaHese1BDlUvreJoWNMt43q1Zfs4
將此Token複製到Firebase控制台使用: 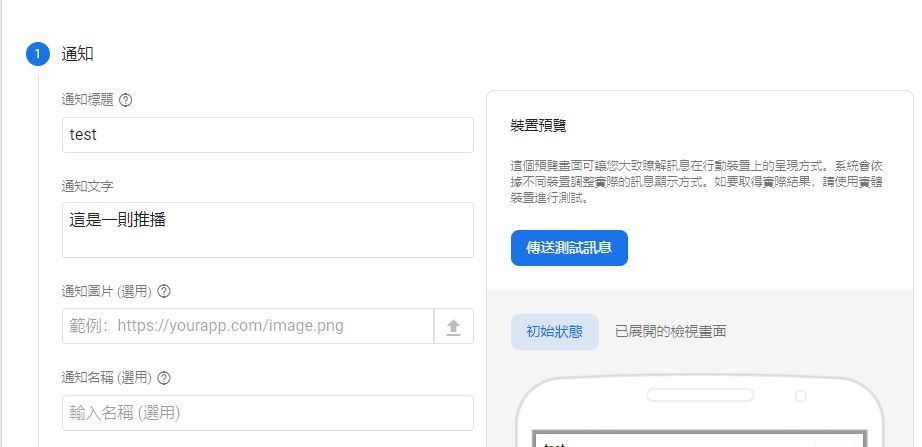
輸入標題與內容後,按下右方的「傳送測試訊息」。
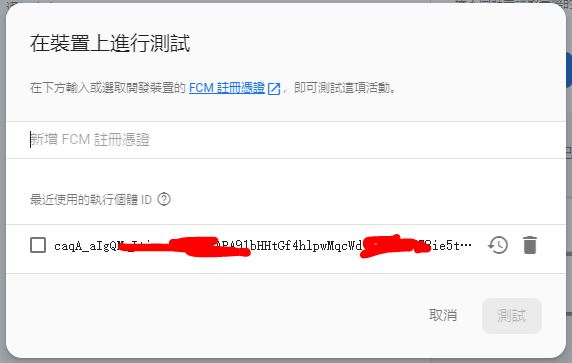
在以上視窗輸入我們剛剛在app中取得的Token,就可以使用這個Token傳送出測試訊息。
這時候app上應該會收到以下訊息:
D/12:20:28.718/FirebaseMessageService: Title = test
D/12:20:28.718/FirebaseMessageService: Body = 這是一則推播
恭喜你成功了!
後續就是要完成通知推播的彈出即可!
-END-
發佈留言