
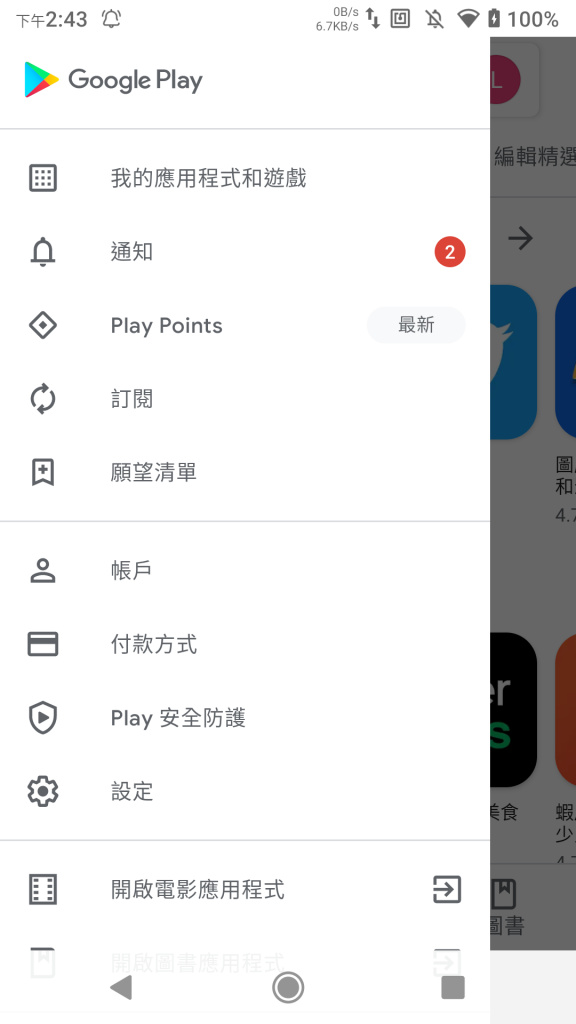
在很多APP中可以看到如下圖從螢幕側邊拉出抽屜的畫面
此功能是由DrawerLayout為基底,加上NavigationView組合而成。
下面介紹如何實作這項功能:
這次是要做出如圖的功能↓

1.布局Layout:由DrawerLayout為基底,加上自己的布局與NavigationView
<?xml version="1.0" encoding="utf-8"?>
<androidx.drawerlayout.widget.DrawerLayout xmlns:android="http://schemas.android.com/apk/res/android"
    xmlns:app="http://schemas.android.com/apk/res-auto"
    xmlns:tools="http://schemas.android.com/tools"
    android:id="@+id/drawerLayout"
    android:layout_width="match_parent"
    android:layout_height="match_parent">

    <androidx.constraintlayout.widget.ConstraintLayout
        android:layout_width="match_parent"
        android:layout_height="match_parent">

        <androidx.appcompat.widget.Toolbar
            android:id="@+id/toolbar"
            android:layout_width="match_parent"
            android:layout_height="80dp"
            android:background="?attr/colorPrimary"
            android:minHeight="?attr/actionBarSize"
            android:paddingTop="20dp"
            android:theme="?attr/actionBarTheme"
            app:layout_constraintEnd_toEndOf="parent"
            app:layout_constraintStart_toStartOf="parent"
            app:layout_constraintTop_toTopOf="parent" />
    </androidx.constraintlayout.widget.ConstraintLayout>

    <com.google.android.material.navigation.NavigationView
        android:id="@+id/navigationView"
        android:layout_width="wrap_content"
        android:layout_height="match_parent"
        android:layout_gravity="start"
        app:headerLayout="@layout/drawer_header"
        app:insetForeground="@android:color/transparent"
        app:menu="@menu/home_drawer">

        <LinearLayout
            android:layout_width="match_parent"
            android:layout_height="match_parent"
            android:gravity="bottom"
            android:orientation="vertical"
            android:paddingLeft="20dp"
            android:paddingRight="20dp"
            android:paddingBottom="10dp">

            <Button
                android:id="@+id/btn_logout"
                android:layout_width="match_parent"
                android:layout_height="wrap_content"
                android:text="登出" />
        </LinearLayout>
    </com.google.android.material.navigation.NavigationView>

</androidx.drawerlayout.widget.DrawerLayout>
其中,DrawerLayout底下包了兩個View,ConstraintLayout是我們的主畫面區域,NavigationView是側邊欄畫面區域。
注意:需要有個Toolbar,才能將側邊欄的開關綁定上去,不然就只能用手勢拖拉了! (或是自己做)
NavigationView的屬性中:
app:headerLayout=”@layout/drawer_header” 是Herder部分的畫面(用不到就非必要)
app:menu=”@menu/home_drawer” 是按鈕清單的畫面(用不到就非必要)
以上兩個畫面下面會解釋。
NavigationView中包的LinearLayout這裡是作為Footer來使用,放置登出功能,或是版本號之類..
在drawer_header.xml布局:
<?xml version="1.0" encoding="utf-8"?>
<androidx.constraintlayout.widget.ConstraintLayout xmlns:android="http://schemas.android.com/apk/res/android"
    xmlns:app="http://schemas.android.com/apk/res-auto"
    xmlns:tools="http://schemas.android.com/tools"
    android:orientation="vertical" android:layout_width="match_parent"
    android:layout_height="match_parent">

    <ImageButton
        android:id="@+id/ibtn_DrawerHeader_close"
        android:layout_width="30dp"
        android:layout_height="30dp"
        android:layout_marginStart="16dp"
        android:layout_marginTop="48dp"
        android:adjustViewBounds="true"
        android:background="?android:attr/selectableItemBackgroundBorderless"
        android:padding="5dp"
        android:scaleType="fitCenter"
        android:src="@android:drawable/ic_menu_close_clear_cancel"
        app:layout_constraintStart_toStartOf="parent"
        app:layout_constraintTop_toTopOf="parent" />

    <Button
        android:id="@+id/button"
        android:layout_width="wrap_content"
        android:layout_height="wrap_content"
        android:layout_marginTop="40dp"
        android:text="item1"
        app:layout_constraintEnd_toEndOf="parent"
        app:layout_constraintStart_toStartOf="parent"
        app:layout_constraintTop_toBottomOf="@+id/ibtn_DrawerHeader_close" />

    <Button
        android:id="@+id/button2"
        android:layout_width="wrap_content"
        android:layout_height="wrap_content"
        android:layout_marginTop="40dp"
        android:text="item2"
        app:layout_constraintEnd_toEndOf="parent"
        app:layout_constraintStart_toStartOf="parent"
        app:layout_constraintTop_toBottomOf="@+id/button" />

    <Button
        android:id="@+id/button3"
        android:layout_width="wrap_content"
        android:layout_height="wrap_content"
        android:layout_marginTop="40dp"
        android:text="item3"
        app:layout_constraintEnd_toEndOf="parent"
        app:layout_constraintStart_toStartOf="parent"
        app:layout_constraintTop_toBottomOf="@+id/button2" />

</androidx.constraintlayout.widget.ConstraintLayout>
建立了一個ImageButton與三個Button放在Header中。
在home_drawer.xml Menu佈局中:
<?xml version="1.0" encoding="utf-8"?>
<menu xmlns:android="http://schemas.android.com/apk/res/android">

    <item
        android:id="@+id/menu1"
        android:title="menu1" />
    <item
        android:id="@+id/menu2"
        android:title="menu2" />

</menu>
建立了兩個item供點選。
到這邊為止,Layout的設計準備就完成了。
2.程式碼實作:
class HomeActivity : AppCompatActivity() {

    private lateinit var mNavigationView: NavigationView
    private lateinit var mToolbar: Toolbar
    private lateinit var actionBarDrawerToggle: ActionBarDrawerToggle
    private lateinit var mDrawerLayout: DrawerLayout
    private lateinit var btnLogout: Button

    override fun onCreate(savedInstanceState: Bundle?) {
        super.onCreate(savedInstanceState)
        setContentView(R.layout.activity_home)

        //綁定每項元件
        mDrawerLayout = findViewById(R.id.drawerLayout)
        mToolbar = findViewById(R.id.toolbar)
        mNavigationView = findViewById(R.id.navigationView)
        btnLogout = findViewById(R.id.btn_logout)

        //側邊欄綁定至 Toolbar
        setSupportActionBar(mToolbar)
        supportActionBar?.setDisplayHomeAsUpEnabled(false)
        supportActionBar?.setHomeButtonEnabled(true)

        actionBarDrawerToggle = object : ActionBarDrawerToggle(
            this,
            mDrawerLayout,//側邊欄的Layout
            mToolbar,//綁定側邊欄的Toolbar
            R.string.drawer_open,//字串檔新增開起字串
            R.string.drawer_close//同上
        ){  //側邊欄開啟關閉的動作
            override fun onDrawerClosed(view: View){
                super.onDrawerClosed(view)
                //當側邊欄關閉
            }

            override fun onDrawerOpened(drawerView: View){
                super.onDrawerOpened(drawerView)
                //當側邊欄開啟
            }
        }

        actionBarDrawerToggle.syncState()
        mDrawerLayout.addDrawerListener(actionBarDrawerToggle)

        //側邊欄項目(menu)點擊的動作
        mNavigationView.setNavigationItemSelectedListener { item ->
            when (item.itemId) {
                R.id.menu1 -> {
                    Toast.makeText(this@HomeActivity, "點了menu1", Toast.LENGTH_SHORT).show()
                }
                R.id.menu2 -> {
                    Toast.makeText(this@HomeActivity, "點了menu2", Toast.LENGTH_SHORT).show()
                }
            }
            item.isCheckable = false
            //點擊後關閉側邊欄
            mDrawerLayout.closeDrawer(GravityCompat.START)
            return@setNavigationItemSelectedListener true
        }

        //側邊欄Footer的元件監聽
        btnLogout.setOnClickListener {
            mDrawerLayout.closeDrawer(GravityCompat.START)
            Toast.makeText(this, "登出", Toast.LENGTH_LONG).show()
        }

        //取得側邊欄Header的元件
        val headerLayout: View = mNavigationView.getHeaderView(0)// index 0 = HeaderView

        //監聽Header的元件
        val ibtnClose: ImageButton = headerLayout.findViewById(R.id.ibtn_DrawerHeader_close)
        ibtnClose.setOnClickListener {
            mDrawerLayout.closeDrawer(GravityCompat.START)
            Toast.makeText(this, "關閉", Toast.LENGTH_LONG).show()
        }

    }
}
按返回鍵時優先關閉側邊欄
override fun onBackPressed() {
//        super.onBackPressed()
  //如果側邊欄開著就先關閉側邊欄
  if(dlDrawerLayout.isDrawerOpen(GravityCompat.START)){
    dlDrawerLayout.closeDrawer(GravityCompat.START)
  }else{
    finish()
  }
}
-待續-
發佈留言